
A damaged vehicle can make every day feel less certain. You may be arranging rides, speaking with an insurance company, and wondering when your vehicle will be back in your driveway. This example of insurance repair timeline shows the typical stages after a collision, along with the factors that can change the schedule.
No two repairs follow the exact same calendar. A bumper repair with readily available parts may move quickly, while structural repairs, hidden damage, specialty paintwork, or parts delays can add time. A dependable repair shop should not guess at a completion date before the vehicle has been properly inspected. What it can provide is a clear process, honest updates, and a plan for moving the repair forward.
An Example of Insurance Repair Timeline
The timeline below is a practical illustration of how an insurance-related collision repair may progress. The number of days is a general range, not a promise. The condition of the vehicle, the insurance claim process, parts availability, and repair complexity all matter.
Day 1: Start the claim and arrange an estimate
After an accident, contact your insurance company to report the loss and obtain a claim number. If the vehicle is unsafe to drive, arrange for it to be towed rather than continuing to operate it. Keep the claim number, adjuster contact information, and any photos or documentation in one place.
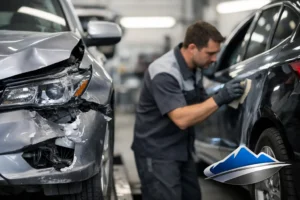
At the repair shop, a technician or estimator reviews the visible damage and prepares an initial estimate. This may include body damage, paint damage, glass concerns, mechanical issues, and signs of frame or structural impact. A good estimate is detailed, but it is still based on what can be seen before disassembly.
You can generally choose the repair shop you want to use. Choosing a shop that communicates directly and clearly can make the claim process easier to follow without putting the burden of every update on you.
Days 2-5: Insurance review and repair planning
The insurer reviews the estimate, photos, or inspection information as part of the claim. In some cases, an adjuster may inspect the vehicle in person or remotely. The shop can coordinate with the insurer on repair details, but the timing of authorization depends on the specific claim and insurance company.
Once the repair direction is clear, the shop creates a repair plan and begins identifying the parts needed. This is an important stage because parts availability often has a major effect on the overall timeline. Common replacement parts may be available quickly, while certain trim pieces, sensors, structural components, or parts for older vehicles can take longer to locate and receive.
Days 4-10: Parts ordering and vehicle disassembly
Many shops order likely-needed parts as soon as the repair plan supports it. At the same time, the vehicle may be disassembled further to expose damage behind the bumper, fender, door skin, or other exterior panels.
This is often when hidden damage is found. A low-speed impact can still damage brackets, sensors, mounting points, cooling components, suspension parts, or reinforcements behind the visible panel. Finding this damage is not a sign that the first estimate was careless. It is a normal part of repairing a vehicle properly, since some damage cannot be confirmed until components are removed.
If additional repairs are needed, the shop prepares a supplement for the insurer. The insurer then reviews the added damage and repair operations. This review can add time, but it helps ensure the repair plan reflects the vehicle’s actual condition rather than only its surface appearance.
What Happens During the Main Repair Stage
Days 7-15: Structural, mechanical, and body repairs
Once the necessary approvals and parts are in place, the main repair work begins. The order of operations matters. If the vehicle has structural damage, technicians first measure and repair the affected areas so panels, mechanical components, and safety-related systems can be installed in the correct positions.
Body repairs may include replacing damaged panels, repairing dents, restoring panel alignment, or addressing damaged mounting points. Mechanical repairs may be needed when an impact affects steering, suspension, cooling, lighting, or related components. Modern vehicles can also require attention to cameras, sensors, and other driver-assistance equipment after collision work.
A repair that looks simple from the outside can involve several connected systems. That is why a shop should prioritize correct repairs over rushing the vehicle through the process.
Days 12-20: Paint preparation and refinishing
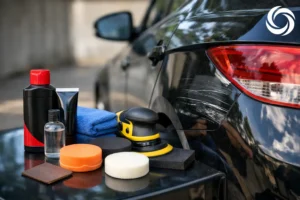
After bodywork is complete and panels fit correctly, the vehicle moves into paint preparation. Technicians sand, prime, mask, and prepare the repaired area for color and clear coat. Depending on the location of the damage and the vehicle’s finish, adjacent panels may need to be blended so the color transitions naturally.
Refinishing is more than applying paint. Temperature, curing time, panel condition, paint formula, and finish quality all affect the process. Custom colors, pearl finishes, tri-coat paint, and vehicles with prior repair history may require additional testing or preparation. Those details can influence the schedule, but they are worth addressing before reassembly.
Days 18-25: Reassembly, calibration, and quality checks
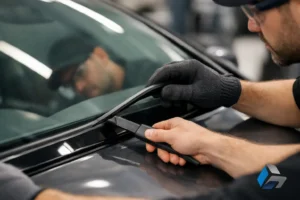
Once the finish has cured, the vehicle is reassembled. This includes installing trim, lights, bumpers, glass components, hardware, and replacement parts. Technicians check panel gaps, latches, electrical functions, warning lights, and the operation of repaired components.
Some vehicles require calibrations after repairs involving cameras, sensors, radar units, windshield replacement, suspension work, or structural components. The exact requirements depend on the vehicle and the repairs performed. This step should not be skipped simply to shorten a timeline.
The final quality-control process may include a road test when appropriate, an alignment check, cleaning, and a final review of the repair. If a concern is found at this stage, correcting it before pickup is the right outcome, even if it adds a little time.
Why Repair Timelines Change
The most common reason for a timeline change is newly discovered damage during disassembly. Other factors include parts backorders, additional insurer review, weather-related shipping delays, specialty materials, and the need for calibration or mechanical work.
Communication makes a meaningful difference when one of these issues arises. Customers should know what changed, why it affects the repair, and what the next step will be. Ask the shop how it handles updates and whether it will contact you when parts arrive, supplements are submitted, or the completion window changes.
It also helps to avoid scheduling a major trip or vehicle-dependent event around an early estimate. Until the repair is disassembled, approved, and supplied with the needed parts, the timeline is still developing.
How to Help Keep Your Repair Moving
You do not have to manage the repair yourself, but a few prompt actions can prevent unnecessary delays. Provide the claim number and insurer details to the shop, review messages from your insurer promptly, and make sure the shop has the best phone number and email address for updates.
If you have questions about deductible responsibility, rental coverage, or claim status, ask early. A repair facility can help explain the repair process and communicate with the insurer, while your insurance company can clarify the details of your coverage. Keeping those conversations organized helps everyone work from the same information.
For drivers in Antioch and nearby Lake County communities, Carbon Collision Repair provides clear estimates, insurance claim assistance, and repair updates designed to make an already stressful situation easier to manage. The goal is not to rush a vehicle out the door. It is to return it after the necessary work has been completed with care, attention, and accountability.
When you receive an initial repair timeline, treat it as an informed starting point rather than a fixed promise. The right shop will explain what is known, identify what still needs to be confirmed, and keep you informed as your vehicle moves from estimate to final inspection.