
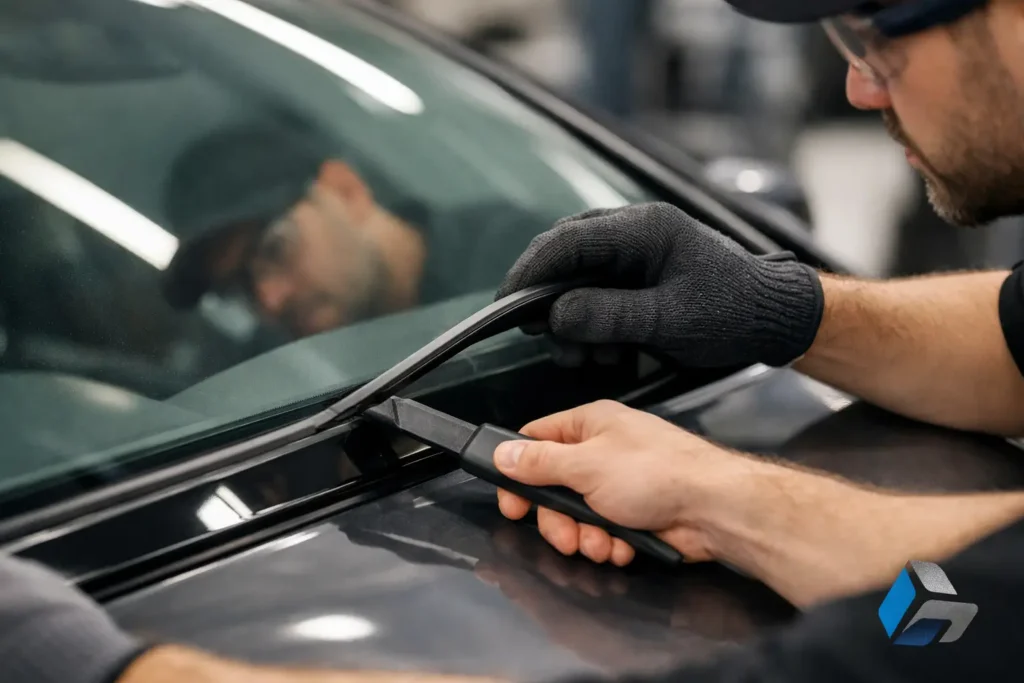
A loose, cracked, or missing windshield molding can make an otherwise well-kept vehicle look unfinished. It can also let debris collect around the glass and hide corrosion near the windshield opening. Knowing how to replace windshield trim starts with identifying what is actually loose, because not every trim piece can be removed and reinstalled the same way.
On some vehicles, the visible piece is a snap-in reveal molding. On others, it is a gasket-style weatherstrip or molding installed as part of a bonded windshield replacement. Using the wrong removal method can crack the glass, bend the body flange, damage paint, or create a leak that was not there before. A careful inspection comes first.
Identify the Type of Windshield Trim Before You Start
“Windshield trim” is a broad term. The part around your windshield may be a decorative molding, a rubber weatherstrip, a plastic cowl-side trim panel, or a component that helps finish and retain the glass installation. Vehicle year, make, model, and windshield design all matter.
A snap-in reveal molding usually sits along the outer edge of the windshield and locks into small clips. It may be possible to replace this style without removing the glass, provided the clips, body flange, and windshield edge are in good condition.
A gasket-mounted windshield is more common on older vehicles and some classic cars. The rubber gasket wraps around the glass and body opening. Replacing it often means removing the windshield, especially if the gasket is hardened, torn, or no longer sealing evenly.
Many modern vehicles use urethane adhesive to bond the windshield to the body. The visible molding may look removable, but it can be installed under the glass edge or be damaged during windshield removal. If the trim is trapped beneath the glass, replacing it properly requires removing and reinstalling the windshield with the correct materials and procedures.
Before ordering a part, compare the old molding with the replacement and confirm that it matches your vehicle’s exact configuration. Windshields can vary by trim level, rain sensor, camera equipment, and production date.
Inspect for Damage That Trim Alone Will Not Fix
Do not assume a new molding will solve every issue around the windshield. Look closely for chipped paint, rust bubbles, exposed metal, cracked glass, missing clips, or a windshield that appears to sit unevenly in the opening.
Rust is especially important. Trim can conceal corrosion along the pinch weld, which is the metal edge where a bonded windshield attaches. Installing new molding over corrosion may improve the appearance temporarily, but it does not address the underlying problem. Left untreated, corrosion can spread, affect how the windshield sits, and complicate a future glass replacement.
If you notice damp carpet, water trails near the A-pillars, a musty odor after rain, or wind noise at highway speed, the concern may be a failed windshield seal rather than exterior trim. In that situation, replacing the molding alone may not stop the leak. The glass and surrounding metal should be inspected before any cosmetic work begins.
This is also a good time to consider recent collision damage. A hit near the front corner, roofline, or fender can shift panels or damage the windshield opening. Even slight distortion can keep replacement trim from fitting correctly.
Tools and Materials for Replacing Snap-In Trim
If your vehicle uses an accessible snap-in molding and the windshield is secure, gather the right tools before starting. Metal screwdrivers and sharp picks are common causes of scratched paint and cracked trim, so use trim-specific tools whenever possible.
You will typically need:
- The correct replacement windshield molding
- New retaining clips, if your vehicle uses them
- Plastic trim removal tools
- A soft microfiber towel and automotive-safe cleaner
- Masking tape to protect nearby paint
- A flashlight for inspecting clips, sealant, and corrosion
Replacement clips are worth having on hand even if the old ones appear usable. Plastic clips become brittle with age and often break when the molding is removed. Reusing bent, loose, or damaged clips can leave the new trim lifting away from the windshield edge.
How to Replace Windshield Trim Step by Step
1. Clean the work area and protect the paint
Wash away dirt around the windshield perimeter. Grit trapped beneath a trim tool can leave scratches in the paint or glass. Dry the area completely, then apply a narrow strip of masking tape along painted edges where you will be working.
Park the vehicle on level ground and work in moderate temperatures when possible. Cold plastic is more likely to crack, while extreme heat can make trim and adhesive unusually soft.
2. Find the molding seam or starting point
Most reveal moldings have a joint, corner, or end section where removal can begin. Check the upper corners, lower corners, and areas near the cowl. Do not force a tool under the center of a long molding just because it appears loose there.
Use a plastic trim tool to gently lift the molding enough to see how it is retained. If it releases from clips with light, controlled pressure, continue slowly along the edge. If it feels trapped under the glass or strongly bonded with adhesive, stop. That style may require windshield removal.
3. Remove the molding without twisting it
Work a few inches at a time. Release one clip, support the molding, then move to the next attachment point. Pulling a long section sharply can crack the trim, break multiple clips, or pull on the windshield edge.
Pay attention to the order of any corner pieces, end caps, or adjoining cowl trim. Taking a few photos before removal can make installation much easier, particularly on vehicles with several overlapping pieces.
4. Remove old clips and inspect the channel
Once the molding is off, remove any clips left in the body channel. A clip remover or plastic tool is usually safer than prying with a metal tool. Inspect each attachment point for bent metal, old adhesive, paint damage, or corrosion.
Clean loose debris from the channel, but do not scrape aggressively at the urethane bead that secures a bonded windshield. Cutting, puncturing, or lifting the urethane can create a leak or weaken the glass installation. If you find questionable sealant or corrosion, have it evaluated before installing new trim.
5. Install new clips and test-fit the molding
Install new clips in the same locations and orientation as the originals. They should sit flat and hold firmly. Then place the new molding in position without forcing it into place. Check that its ends meet correctly at the corners and that it follows the windshield perimeter evenly.
A molding that seems too short, too long, or difficult to align is often the wrong part or a sign that an adjacent panel, clip, or windshield position needs attention. Forcing it can leave permanent waves or gaps.
6. Press the molding into place gradually
Starting at the recommended seam or one corner, align the molding with the clips and press using even hand pressure. You should feel or hear each section engage. Move around the windshield in short sections rather than trying to seat the entire piece at once.
Avoid striking trim with a fist, hammer, or hard tool. If a section will not seat, remove it carefully and inspect the clip, channel, and molding lip. A small obstruction is easier to correct now than after the trim is distorted.
7. Check the fit before calling the job finished
Walk around the vehicle and inspect the molding from several angles. It should sit consistently against the glass and body with no raised corners, open gaps, or sections that move when lightly pressed.
A gentle hose test can help reveal obvious water intrusion, but do not use a high-pressure stream directly at the windshield edge. If water appears inside the vehicle, stop testing and arrange for an inspection. The problem may be the glass seal or corrosion beneath the trim, not the molding itself.
When Windshield Trim Replacement Should Be Left to a Professional
A do-it-yourself replacement can make sense for accessible snap-in molding on a vehicle with sound glass, intact paint, and no leak history. It becomes less straightforward when the trim is part of a bonded windshield installation, the glass is cracked, clips are unavailable, or rust is visible around the opening.
Professional service is also the safer choice when a windshield has cameras, sensors, or driver-assistance equipment near the rearview mirror. If windshield removal becomes necessary, those systems may need appropriate inspection and calibration afterward. The goal is not simply to make the trim look right. It is to protect the glass installation, body finish, and systems that depend on correct windshield placement.
For drivers in northeastern Illinois and southeastern Wisconsin, Carbon Collision Repair can inspect surrounding body damage, paint concerns, and corrosion that may be affecting the fit of windshield trim. A clear assessment helps you decide whether the repair is a simple molding replacement or part of a larger glass and body repair.
A new piece of trim should sit quietly and evenly in place. If it will not, that is useful information, not a reason to force it. Taking time to address the condition beneath the molding protects the appearance of your vehicle and helps prevent a smaller issue from becoming a more involved repair.