A scratch that appeared after a grocery-store parking lot stop can be frustrating, especially when the rest of your vehicle is in good shape. The best car scratch repair kits can improve certain light defects at home, but the right result depends far more on the depth of the scratch and the condition of the paint than on the promises printed on the package.
For many Lake County drivers, a DIY kit is a sensible first step for a faint scuff or clear-coat mark. For deeper damage, though, a quick fix can leave an obvious patch, expose metal to moisture, or make a future paint repair more involved. Knowing where that line falls helps you spend wisely and protect your vehicle’s appearance.
What the Best Car Scratch Repair Kits Can Fix
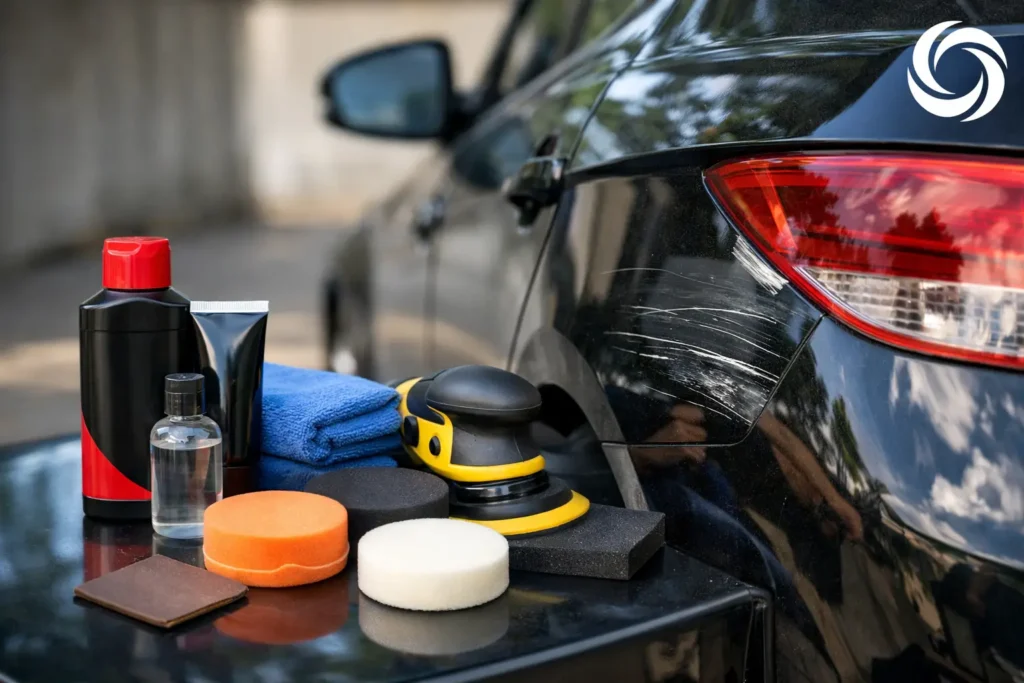
Most vehicle paint has several layers: primer, color coat, and clear coat. A scratch repair kit works best when damage is limited to the clear coat or is a very small chip in the color coat. These are the marks that can often be cleaned, polished, or carefully touched up without repainting an entire panel.
A simple test can provide a useful starting point. Gently run a clean fingernail across the scratch. If your nail does not catch, the mark may be surface-level paint transfer, oxidation, or a light clear-coat scratch. A polishing compound or scratch-removal product may reduce it significantly.
If your nail catches, the scratch is more likely through the clear coat. If you can see a different color underneath, gray primer, bare metal, or plastic, a kit may still help disguise the damage, but it is less likely to create a smooth, durable repair. Deep scratches on a hood, roof, door edge, or rocker panel deserve extra attention because moisture and road salt can reach exposed metal.
The Main Types of Car Scratch Repair Kits
Not every kit addresses the same problem. Choosing the wrong one is a common reason a repair looks disappointing.
Scratch-removal compounds and polishing kits
These products use mild abrasives to level the edges of shallow clear-coat scratches. They are often useful for light scuffs, paint transfer, and haze around a small scratch. The process usually involves washing and drying the area, applying a small amount of compound, and working it gently with a microfiber applicator.
The trade-off is that polishing removes a very thin amount of clear coat. It should be done carefully and only as needed. Aggressive rubbing, a dirty applicator, or repeated passes in one spot can create dullness or swirl marks rather than restoring gloss.
Color-matched touch-up paint kits
Touch-up kits are designed for small chips and narrow scratches that reach the color coat. The better kits include paint matched to the vehicle’s factory paint code, along with an applicator and, in some cases, clear coat.
These kits can be effective for tiny stone chips and narrow marks, especially when the goal is to cover exposed material and make the damage less noticeable from normal viewing distance. They are not usually the right choice for a broad key scratch or a large scraped area. Even correctly matched paint can look darker or lighter after drying due to age, sun exposure, metallic flake orientation, and application thickness.
Paint pens
A paint pen gives the user a small, controlled applicator. It is convenient for pinpoint chips but can be difficult to use on a long scratch. A heavy hand often leaves a raised line of paint that is more visible than the original damage.
For a small chip, apply thin layers rather than trying to fill the entire defect at once. Let each layer dry as directed, keep the tip clean, and avoid touching the fresh paint until it has cured.
All-in-one filler and sealant products
Some kits combine colored material, filler, and sealant in one product. These can provide a fast cosmetic improvement on light damage, but results vary widely with paint color, scratch depth, and application technique. They are best viewed as a temporary appearance improvement, not a substitute for color blending and refinishing when a panel has noticeable damage.
How to Choose a Kit That Fits Your Vehicle
Start by locating your vehicle’s paint code. It is often found on a label in the driver’s door jamb, under the hood, or in the owner’s documentation. The paint name on a sales brochure is not always precise enough for touch-up work. A code-matched product gives you a better chance of a close result.
Then consider the color and finish. Solid colors can be more forgiving than metallic, pearl, or tri-coat finishes. Metallic paint reflects light differently depending on how it is sprayed and blended, which makes a brush-applied repair easier to spot. Dark colors can also reveal polishing marks, while white and silver may hide a small touch-up edge better from a distance.
It also helps to be realistic about the location. A tiny chip low on a bumper may be a good DIY project. A scratch in the middle of a highly visible door, a sharp body line, or a classic car’s carefully maintained finish may call for a more precise approach.
A Careful DIY Process Makes a Difference
Before using any scratch kit, wash the panel thoroughly with automotive soap and dry it with a clean microfiber towel. Dirt trapped under an applicator can create fresh scratches. Avoid applying products in direct sunlight or on a hot panel, since heat can cause compounds and touch-up paint to dry too quickly.
For light scratches, begin with the least aggressive option. Test a polishing product on a small, inconspicuous portion of the affected area, use light pressure, and inspect the result before continuing. If the mark is paint transfer from another object, it may improve considerably without needing color paint.
For a chip or deeper scratch, clean the area and remove loose material without enlarging the damage. Apply paint in very thin layers. The goal is to build coverage gradually, not create a thick mound. If the kit includes clear coat, follow its instructions closely and allow appropriate drying time between steps.
Do not use household solvents, rough paper towels, or abrasive pads on automotive paint. Products intended for walls, furniture, or general cleaning can damage clear coat or leave residue that interferes with touch-up paint adhesion.
When a Scratch Repair Kit Is Not Enough
DIY products have limits, and recognizing them can save time and frustration. Professional repair is often the better choice when a scratch exposes metal, shows rust, covers a large area, crosses multiple panels, or is paired with a dent, cracked bumper, or bent body panel.
A repair is also more complex when the vehicle has advanced paint finishes, such as pearl white, metallic gray, candy colors, or multi-stage custom paint. Proper refinishing may involve preparing the damaged surface, applying primer, matching the color, blending color into adjacent areas, and applying clear coat for consistent gloss and protection. That process is difficult to duplicate with a bottle or pen.
If a scratch came from a collision, do not assume the damage is only cosmetic. A bumper cover can hide damaged mounting points, and a scraped door can have misalignment or damage beneath the visible surface. An inspection provides a clearer picture before you decide how to proceed.
At Carbon Collision Repair, our technicians can assess whether a light scratch can be polished, whether it needs targeted paintwork, or whether damage extends beyond the surface. For drivers in Antioch and surrounding northern Illinois and southeastern Wisconsin communities, a free estimate can take the guesswork out of the decision.
Avoiding Common DIY Scratch Repair Mistakes
The most common mistake is expecting a kit to make a deep scratch disappear completely. Touch-up paint is designed to protect and reduce visibility, while professional refinishing is intended to restore a more uniform finish across the damaged area.
Another mistake is applying too much product. Thick touch-up paint, excess compound, and hurried clear coat can leave raised edges, cloudy spots, or uneven shine. Work slowly, use clean materials, and stop if the result is getting worse rather than better.
Finally, do not wait too long on exposed metal. Small rust spots can spread beneath surrounding paint, turning a minor scratch into a larger repair. Covering the area promptly with a suitable touch-up product can help, but visible corrosion should be evaluated and properly addressed.
A good scratch repair kit is useful when it matches the damage, the vehicle’s paint code, and your expectations. For anything deeper, more visible, or more valuable to you than a quick cover-up, choosing a careful inspection and quality paint repair is often the more dependable path.